 Product
We have rebranded! ReConvert is now Upsell.com
ReConvert has officially become Upsell.com. Here’s what’s changed, what stays the same, and what this means for your Shopify store.
1 min read
Let's face it, customizing your own Shopify theme isn't easy.
There are plenty of options for out-of-the-box Shopify themes, but it's pretty likely that none of them will fit your store perfectly.
Designing an on-brand checkout page, integrating social media, and creating store-wide updates for the holidays are just a few of the challenges.
But if you're running a Shopify store, you probably don't have the time to learn coding to design a theme yourself.
That's why we're going to teach you how you can use Shopify customization tools to create the perfect theme without an ounce of coding knowledge.
So sit tight and stay tuned, let's get right into how to approach Shopify customization like a pro.
When it comes to Shopify customization, there's a myriad of ways you can tweak your theme to your liking. However, no matter what type customization you want, the choice usually boils down to one of two options:
Depending on your goals, both options can be good choice. So, let's break down the pros and cons and see which is right for you.
Creating a custom Shopify theme means you can craft the perfect template to slot your online store into. But with so many beautiful themes for Shopify, why would anyone want to create a custom theme?
However, before you jump in and start hiring a developer, building your own theme isn't all sunshine and rainbows. Here's why you might not wat to go this route:
In our experience, creating a custom theme isn't the best option for most Shopify entrepreneurs, especially if you're just starting out.
Now, if you're an enterprise store with a larger budget and a clear vision of what you want, it can be a greta option. If that's the case, it'sworth setting up a meeting with an agency like TaskHusky to explore your options.
Shopify offers a fantastic selection of high-converting themes available for free. Which is why we recommend that most merchants choose one and make customizations themselves.
The theme editor can seem pretty daunting at first. There are tons of options and boxes to click, and when you're first logging in -it's pretty overwhelming. But fear not, it's easier to use than you might think.
Ultimately, it's up to you to decide if a custom theme or a editing a pre-built theme is right for your business. If you want to hire a developer the best place to start is to get in touch with a Shopify expert.
For the rest of the post, we'll cover the ins and outs of how to pick a theme and edit it yourself as we reckon that's the option most suitable for most merchants reading this. So, if you're onboard - let's keep trucking!
To start customizing your store, you first need a theme. A theme is simply a templates you use for your store. You'll find a huge selection of themes in Shopify's theme store and at TemplateMonster's marketplace, so if you haven't already, head over there and pick one that aligns with your brand
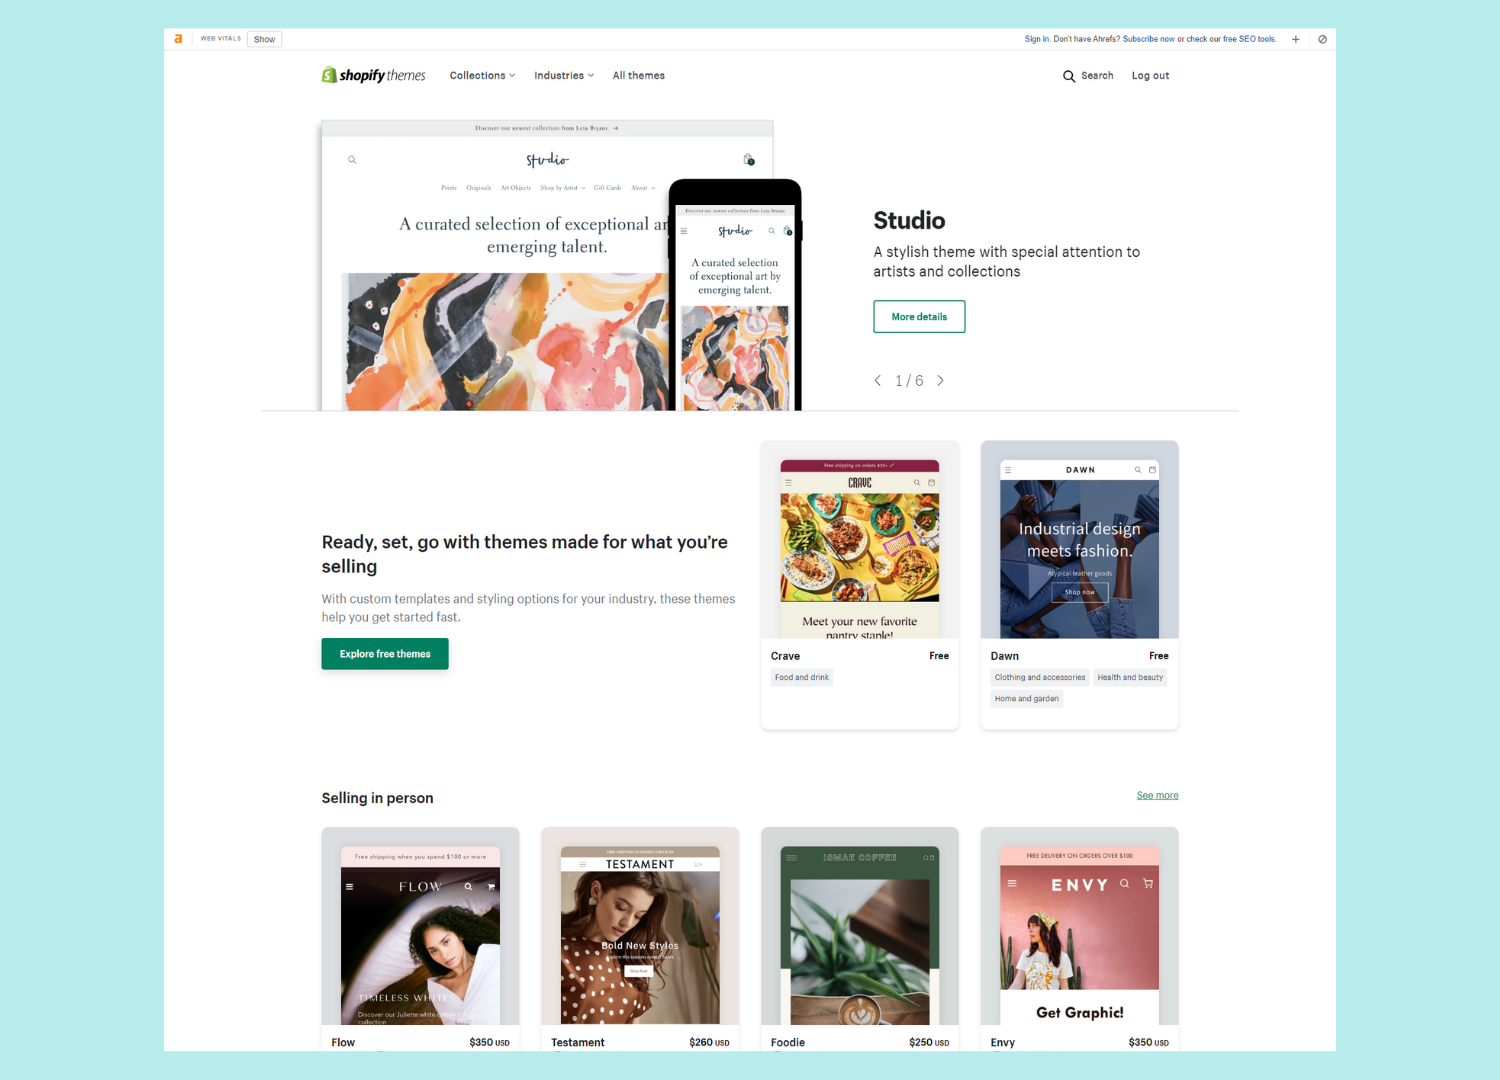
On the Shopify theme store you'll find both free and paid themes. Plus, you can filter by industry to find a layout that's right for you.
We recommend browsing a few catalogues, even in industries you're not in - You might be surprised by how well one of the themes fits. After you find an ideal one, install it to your store.
Today we fancied the look of the the default theme, Dawn. So, let's jump in and show you around the theme editor.
Once you've picked a theme, it's time to mold it to your brand identity using the theme editor. You do this using the theme editor. The Shopify theme editor is a page builder that lets you create store-wide templates and changes to help keep each page on-brand.
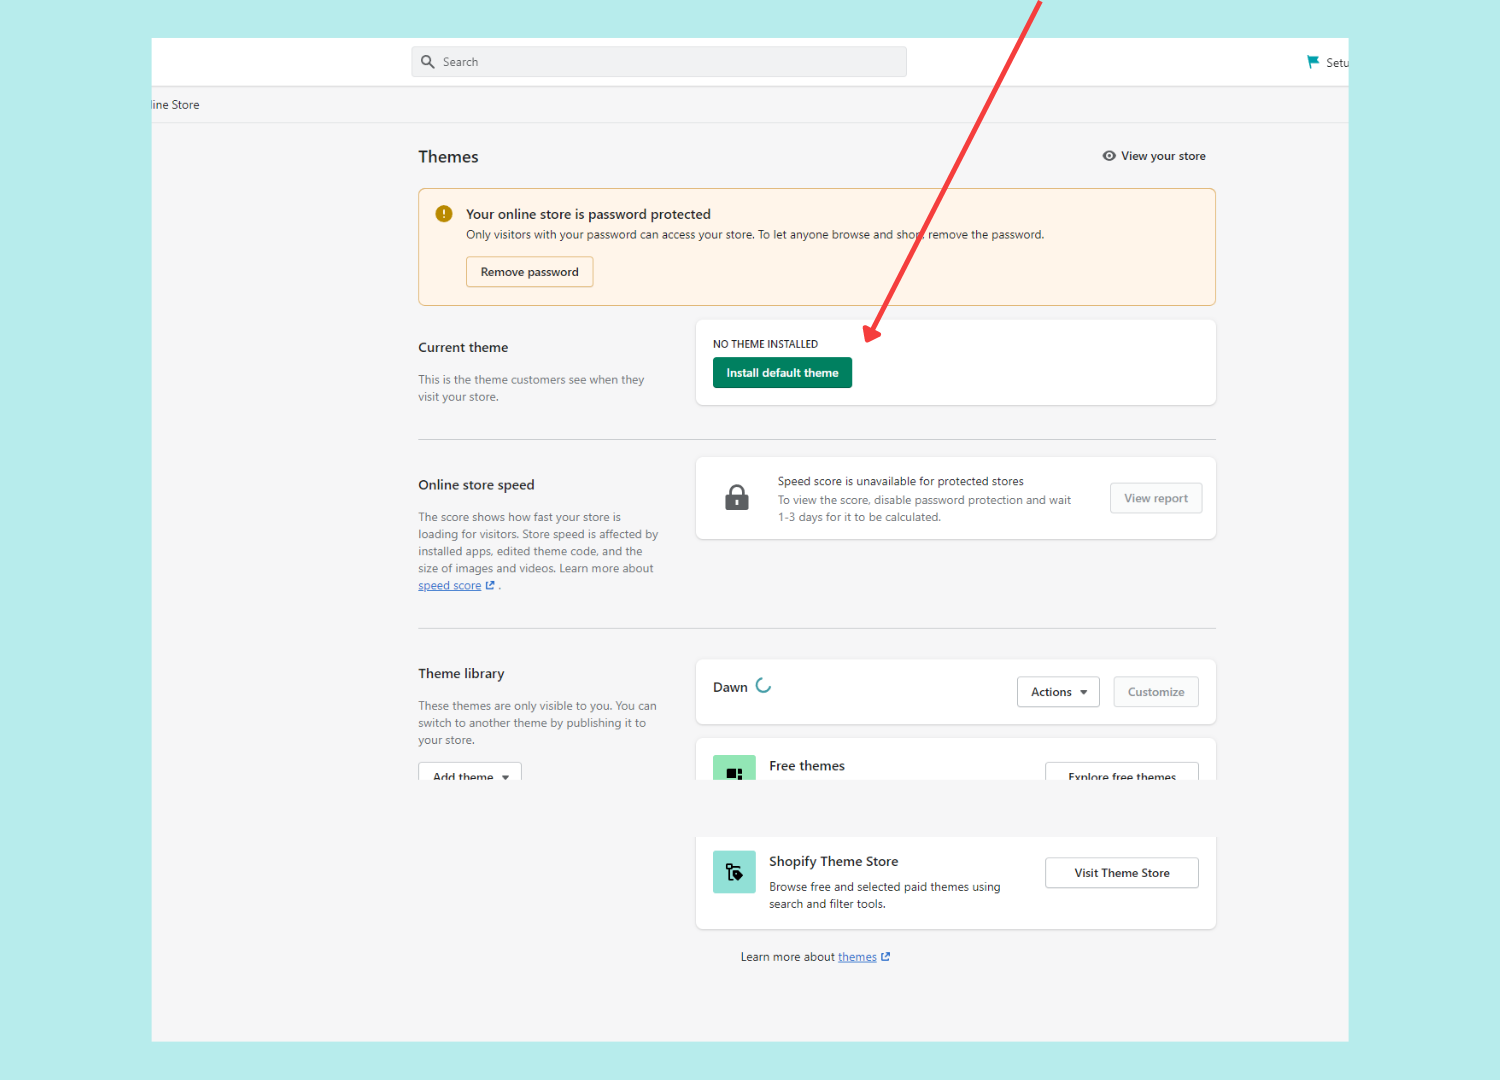
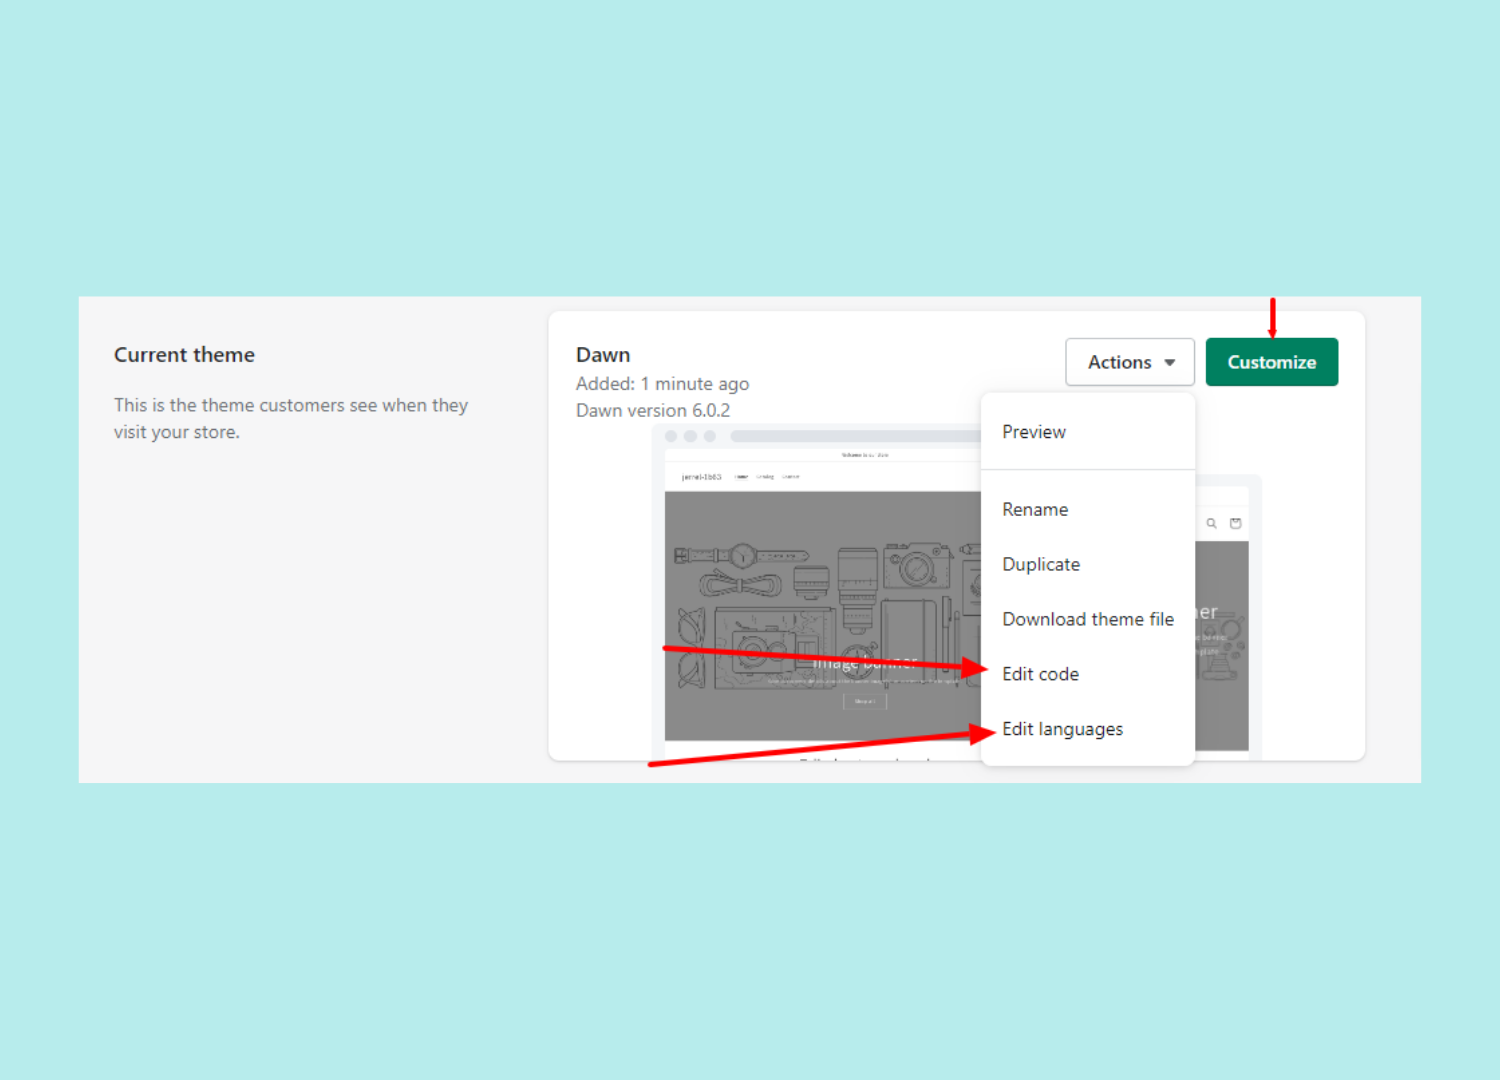
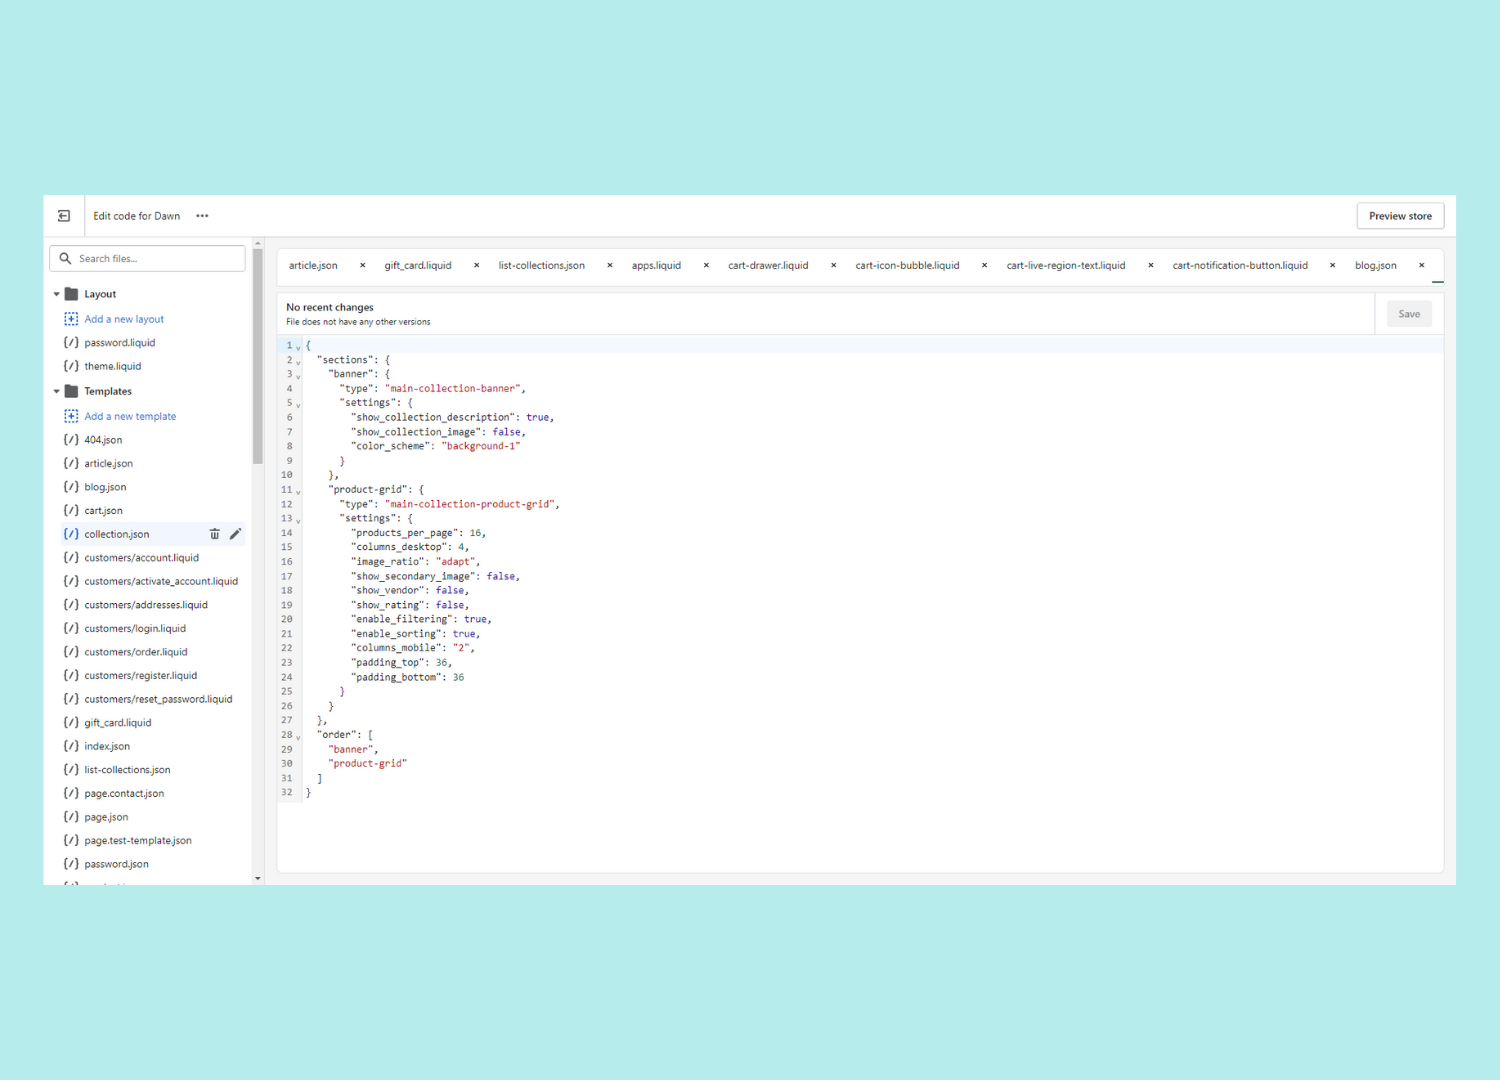
However, we don't recommend playing with your store's code. There's a risk of breaking your theme. Now that you know how to access the parts of the theme editor, let's go on a more in-depth tour.
The Shopify Theme Editor has quite a few moving parts. Some of those parts are more important than others though, so let's break down the most essential ones.
The template editor is one of the most important parts of the theme customization suite. From this tool, you can create templates for every other page of your website to fit in. It's a huge time saver.
For instance, instead of creating individual pages for each product, you can create just one template that automatically imports to every product page.
Once in the Theme Editor, you can access your templates by clicking on the top middle dropdown menu. You can create multiple templates for each page type, and even create new types altogether from here.

Clicking on the Settings button will bring up a whole slew of tabs on the right-hand side of your screen. While all of them have their uses, one of the most important tabs is the Social Media section.
From here, you can link each of your store's social media pages. Once added, each embedded social media icon will lead right to your store's page.
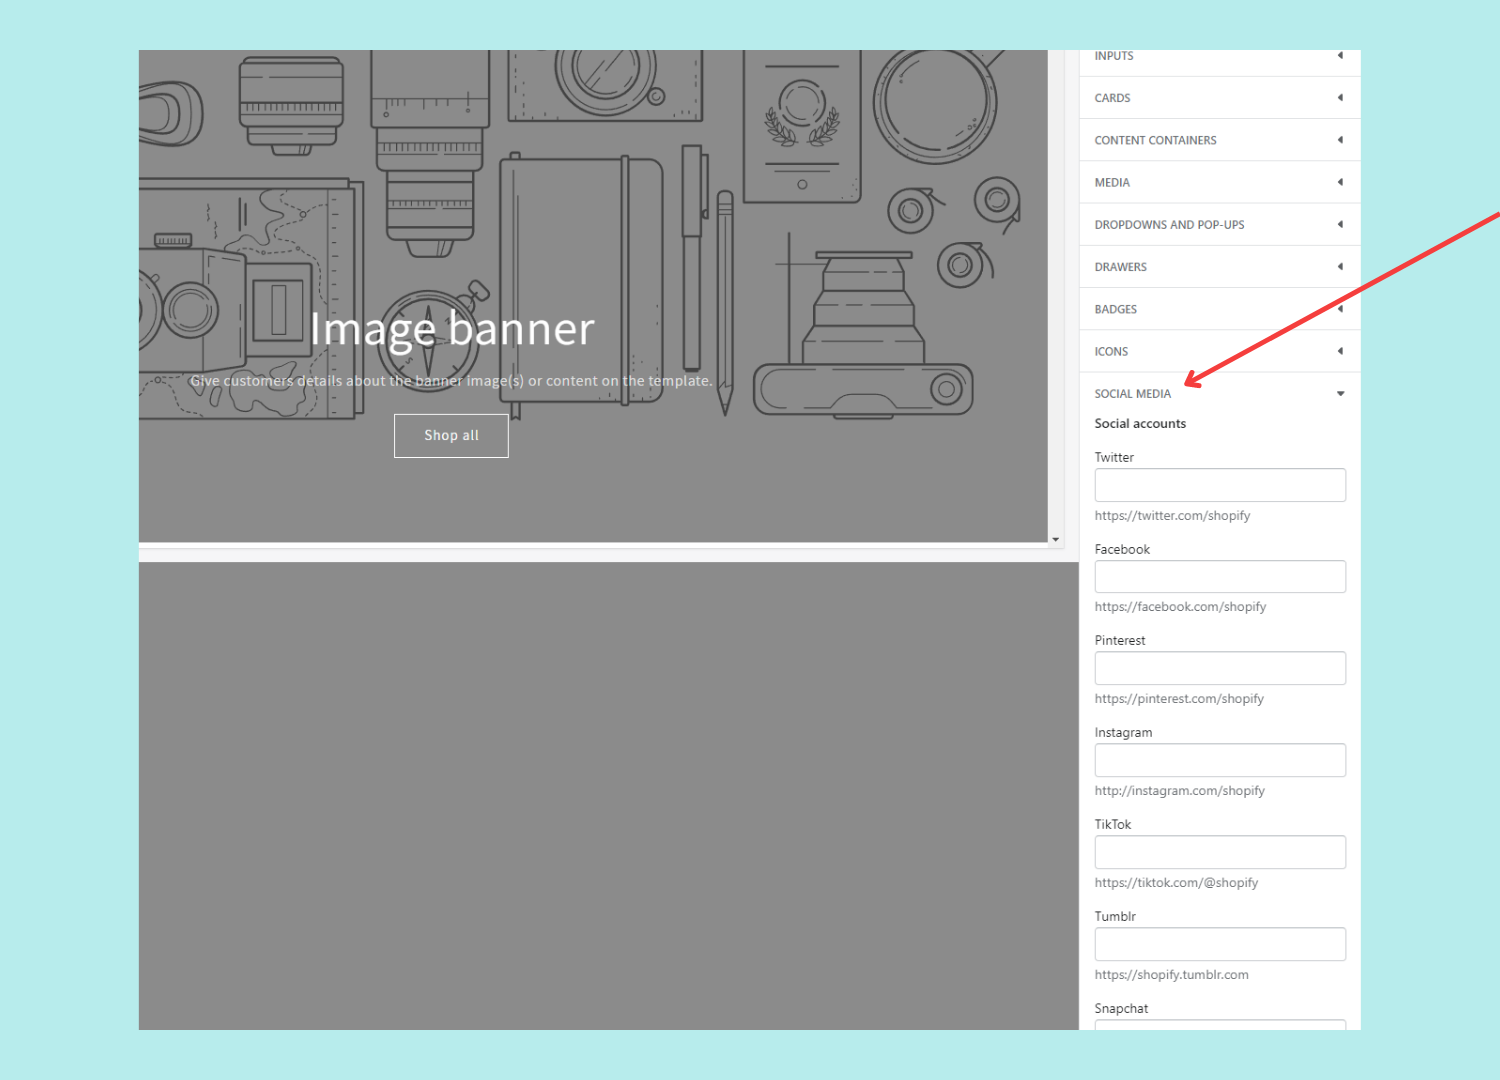
Again, adding your pages from the theme editor is a huge time saver since you won't have to add links to every page manually.
The section editor is where the magic happens. Once you open up the Shopify Theme Editor, you'll see a whole list of icons and sections along the left-hand side.
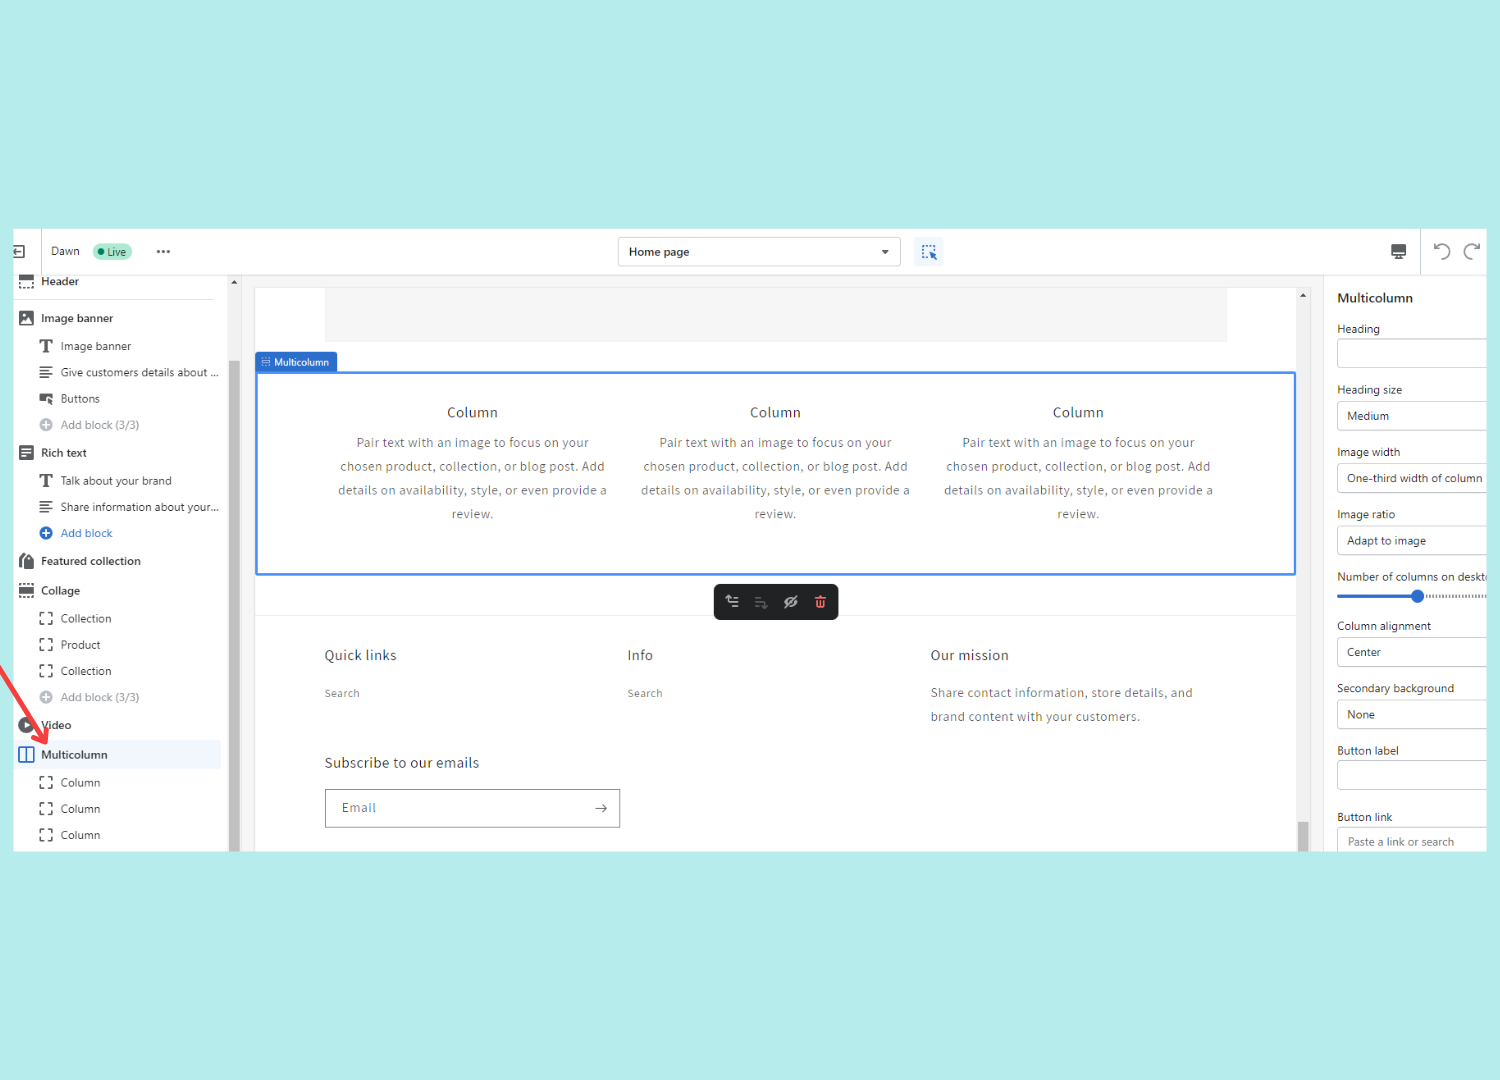
Each of those sections represents an element that shows on-page. From this tool, you can add, remove, edit, or move any section on the page to better fit your store. We'll talk about just how to use this editor a bit further down in the post.
The Styles menu is different in every theme.
In the default Dawn theme, it's only function is allowing merchants to revert their style to the default theme. (i.e., changing colors, fonts, and theme settings back to default values)
Other themes allow you to set different styles that affect your store's aesthetic. You can use these styles to change design for special occasions or to make quick store-wide visual updates.
And the last Shopify customization feature on our list (but not least), is the mobile previewer. The mobile previewer allows you to see what your store will look like on various devices.
This includes desktop, mobile, and even tablets. You can access it by clicking on the monitor icon near the top right:
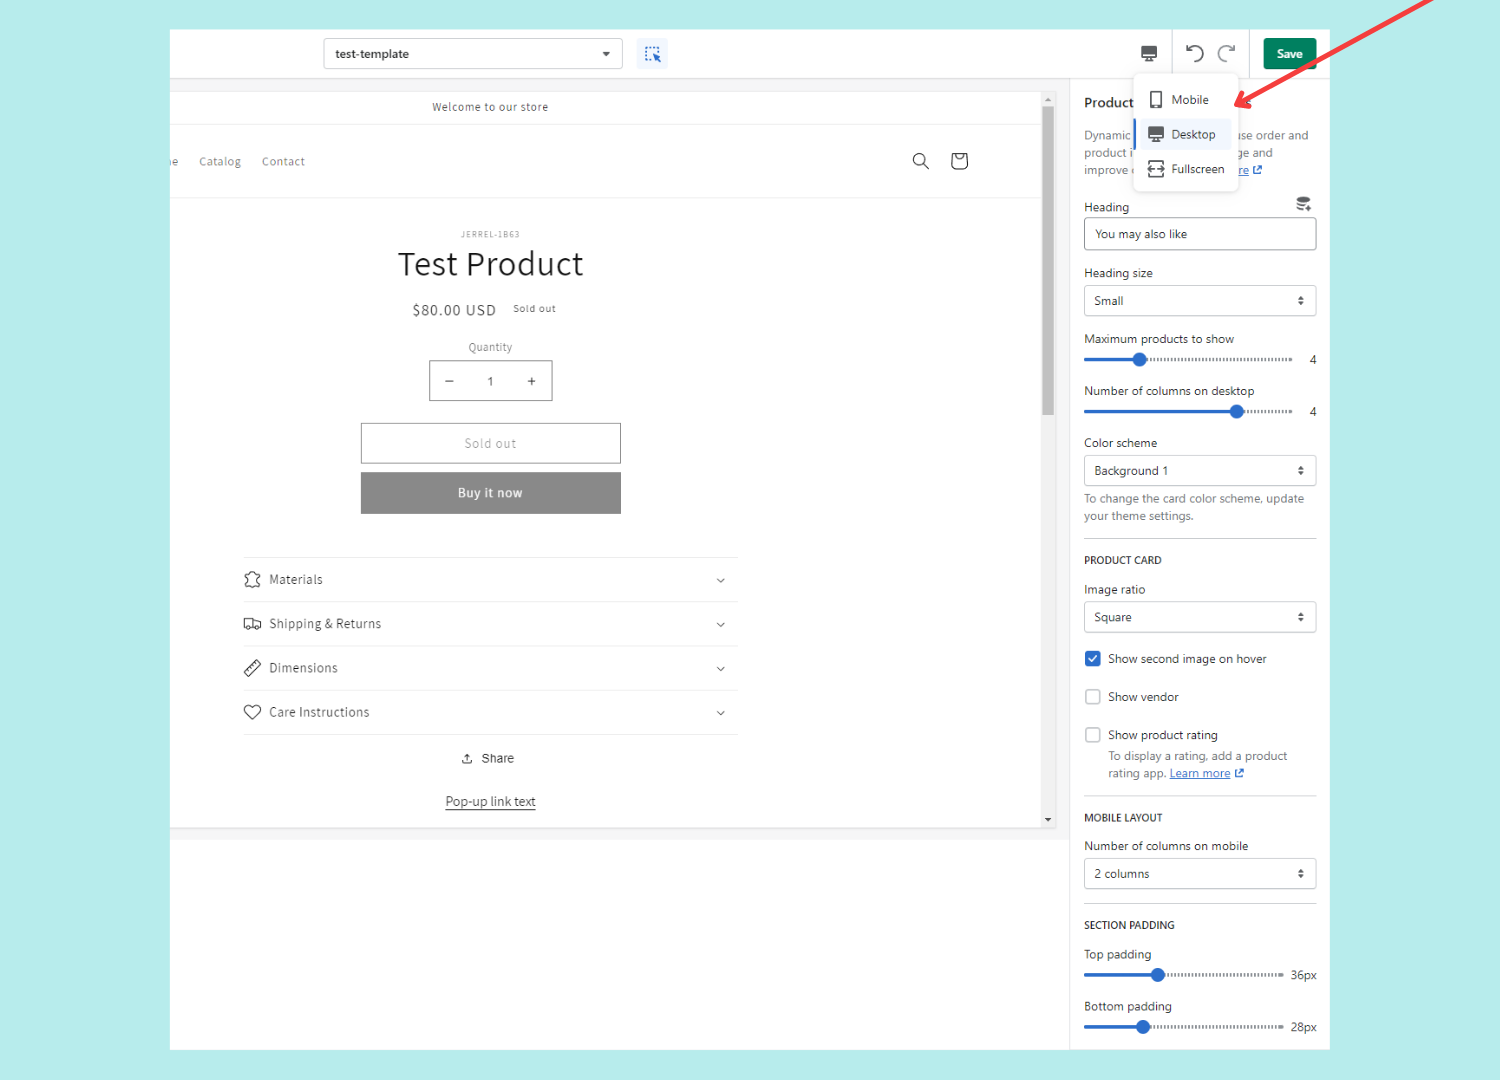
From there, click on Mobile and you'll get a sneak peek of your store from a phone user's perspective.
Upsell.com helps you increase AOV with targeted offers across the full shopping journey, from product and cart to checkout, post purchase, and beyond.
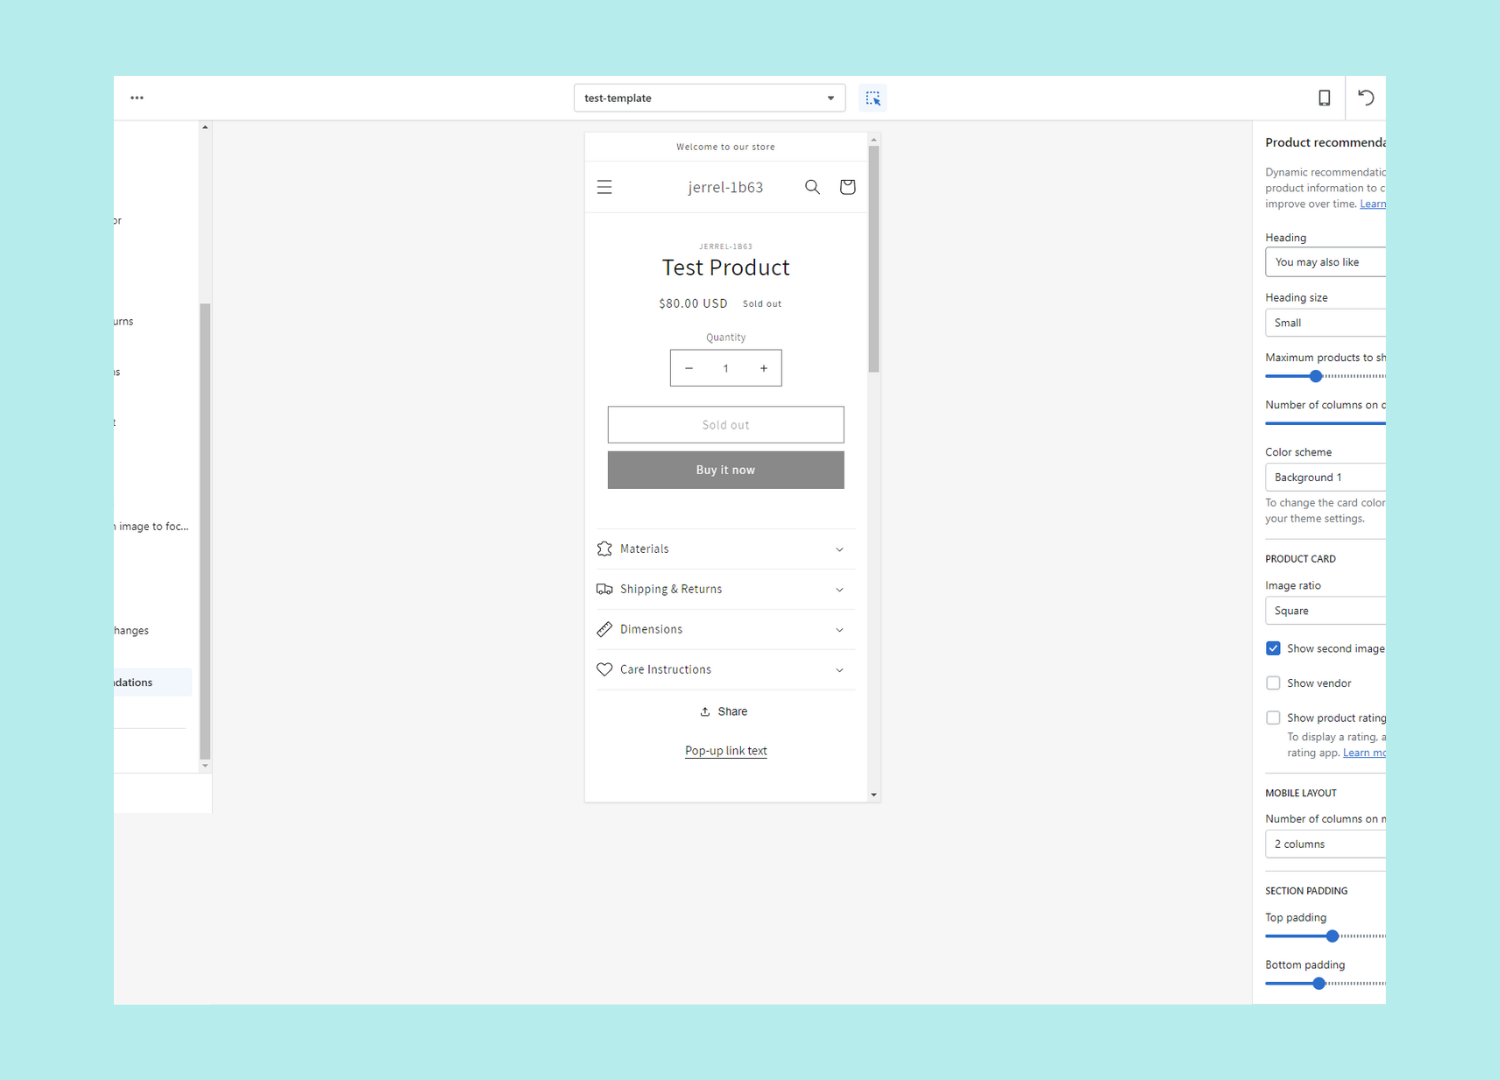
Using the Theme Editor to modify your theme isn't as difficult as it may seem. Here's how to do it with no coding knowledge.
The editor breaks things down into sections, blocks, and columns. These pieces all fall into a hierarchical structure.
Put simply, sections are the larger pieces of a page while blocks and columns are the parts that make sections up.
For instance, an image banner might be the section, while the image itself and the button that appears over it are both blocks within that section.
Columns and blocks are effectively the same thing, different section will either use blocks, columns, or a mix of both. For the rest of this post, we'll just use the term "blocks."
You can add sections or blocks by navigating the left sidebar and clicking Add block or Add section.
To remove a section or block, click the item you want to remove in the sidebar, and then click on Remove at the bottom right of the screen.
To edit a block, you need to click on it from the sidebar.
From there, you'll see a list of options along the right or left side of your screen. Any of these settings can be modified directly to better fit your vision.
Unfortunately, Shopify doesn't allow you to directly drag & drop elements on the visual interface, and certain elements' positions can't be modified.
With that being said, there's still plenty of creative room to design a page that looks great. You can even click the eyeball icon in the sidebar to see what your store would look like without each section or block.
To move a block in the Shopify Theme Editor, simply click the 6 dots that appear when you hover your cursor over a sidebar item. Click and drag the item to the place you want to move it (within the sidebar) and the item will respond on the page accordingly.
Customizing Shopify themes doesn't have to take ages. Using templates, you can speed up the whole process with just a few clicks.
The Shopify Template Editor allows you to create default templates that get assigned to each page. You can create a new template by clicking the middle dropdown menu, from there, each item with an arrow icon is compatible with templates.
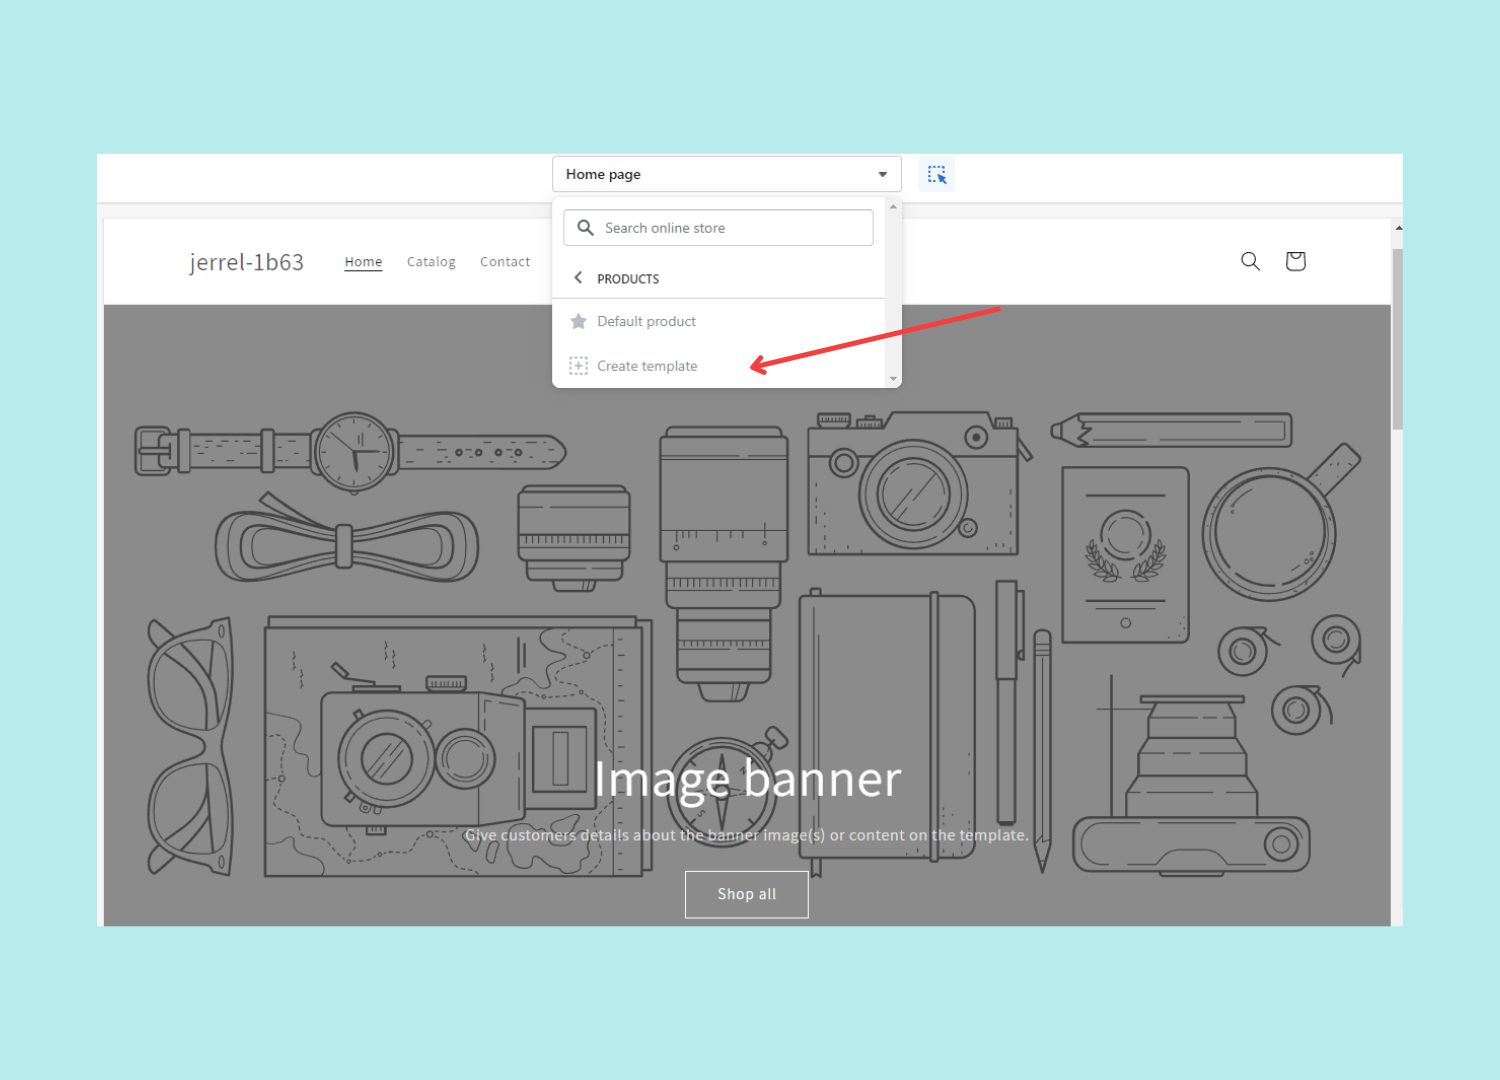
Simple click the item, then click Create template to get started. From there, just edit the page like you would any other.
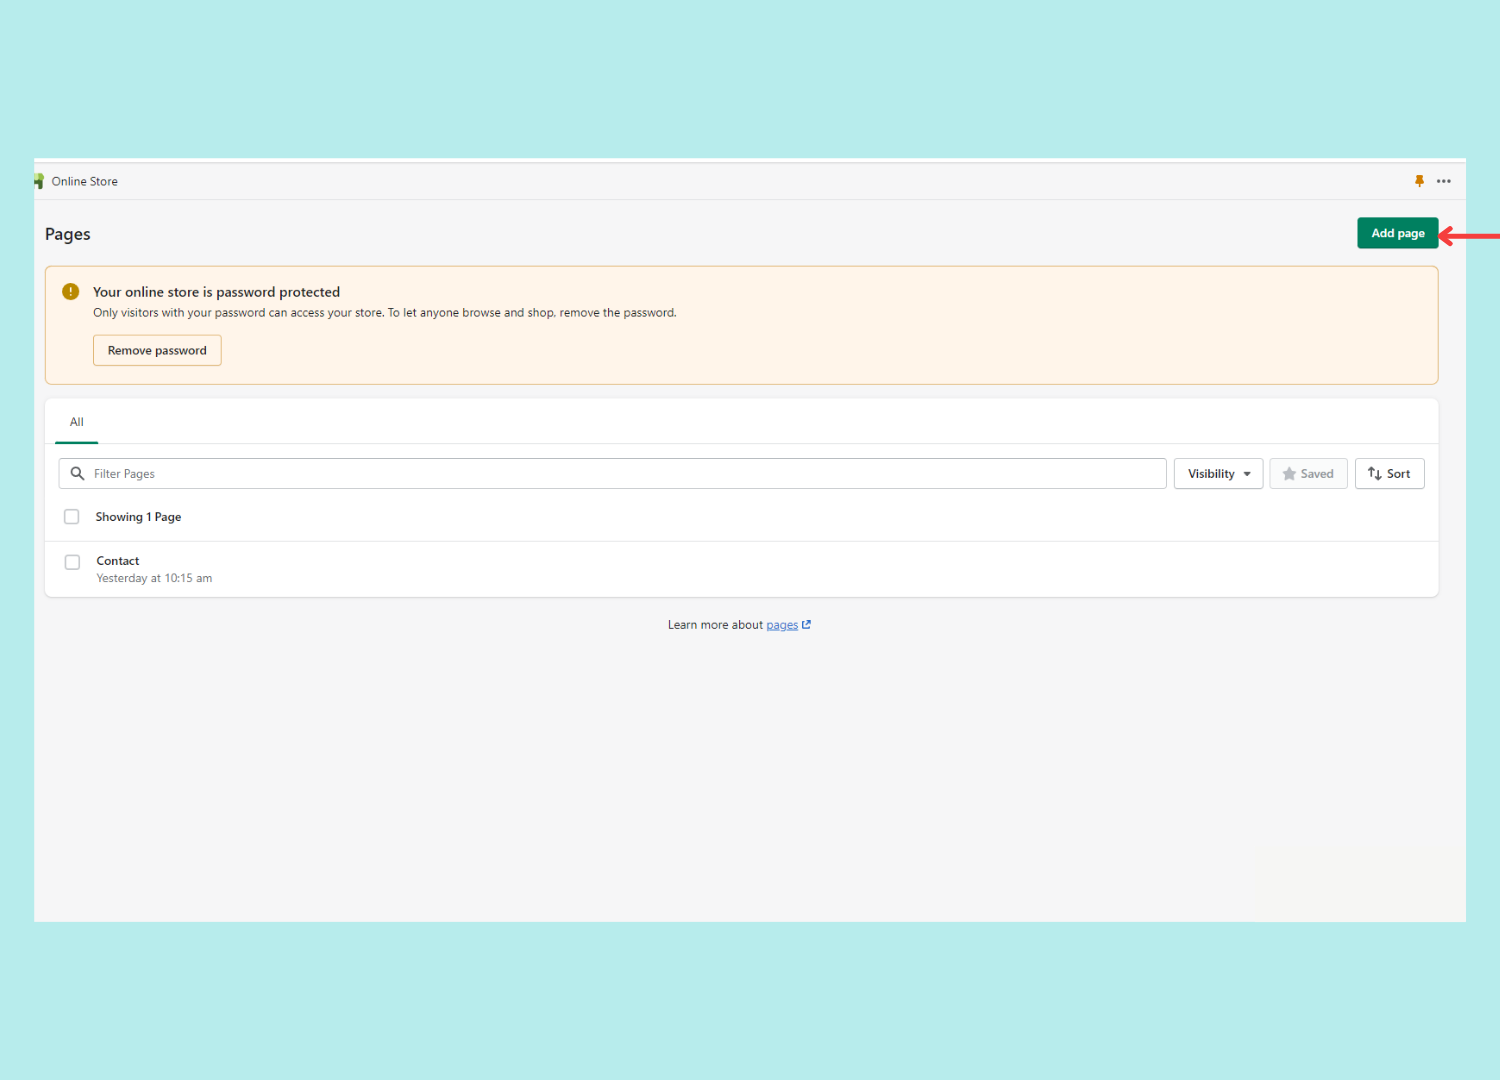
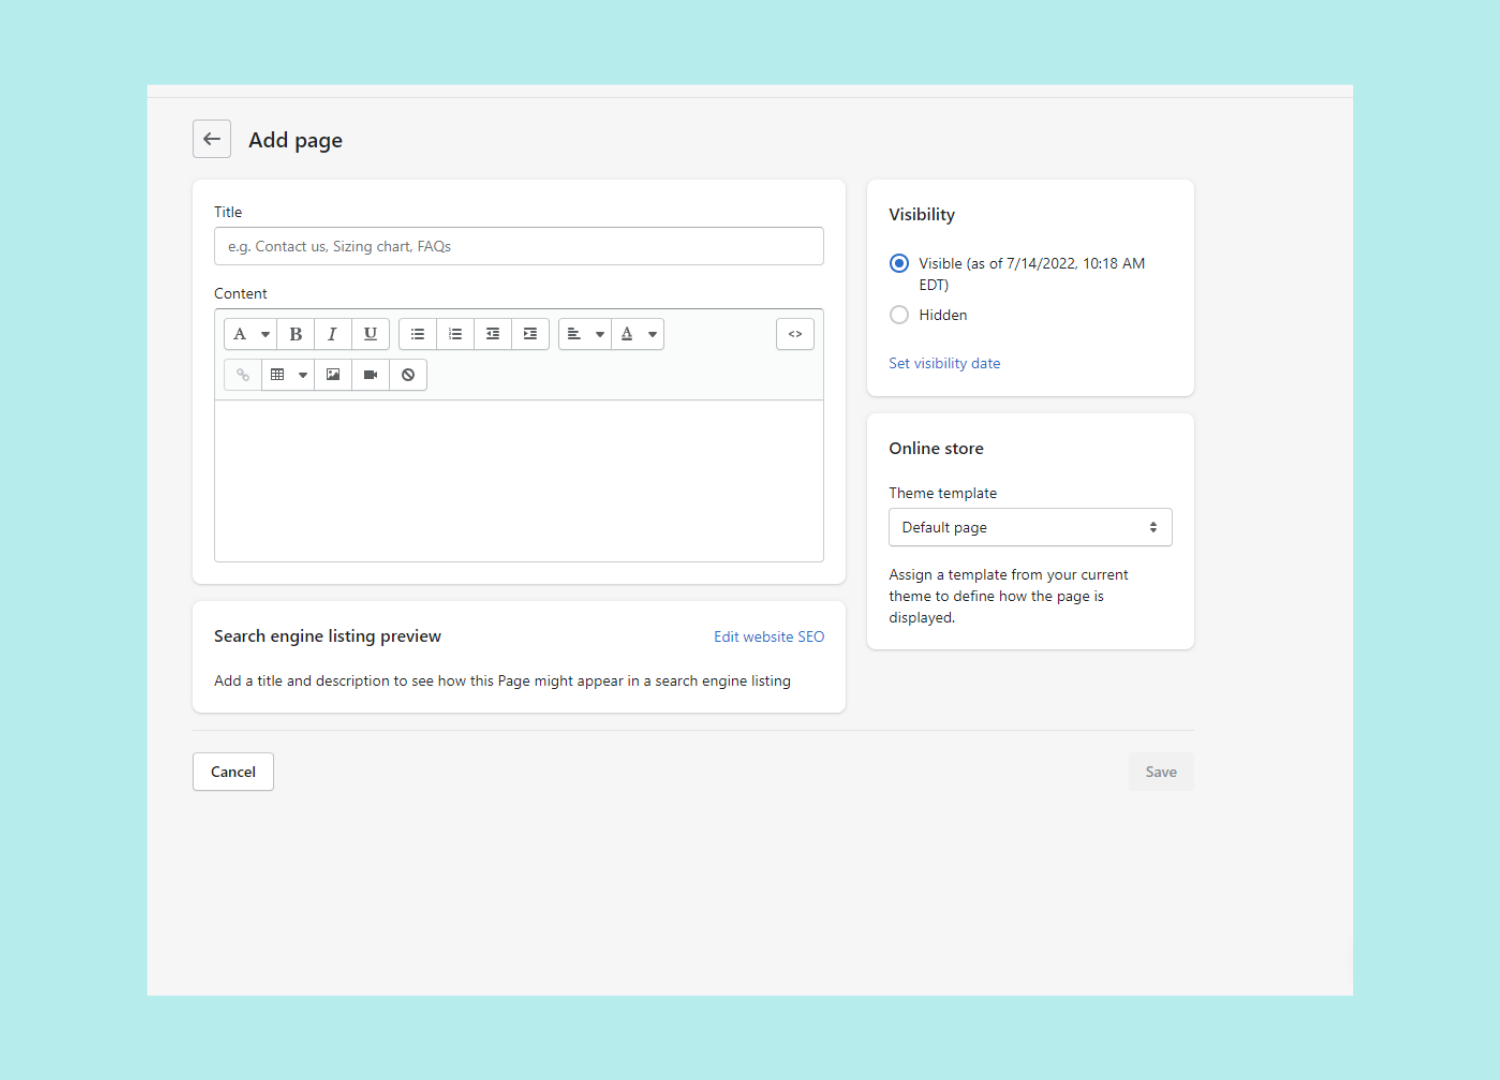
To make use of your new templates, you might need to create new pages on the store. Add a new page is easy, simply navigate to the Pages screen under the Online Store section. From there, you'll see a button near the top-right that says Add page.
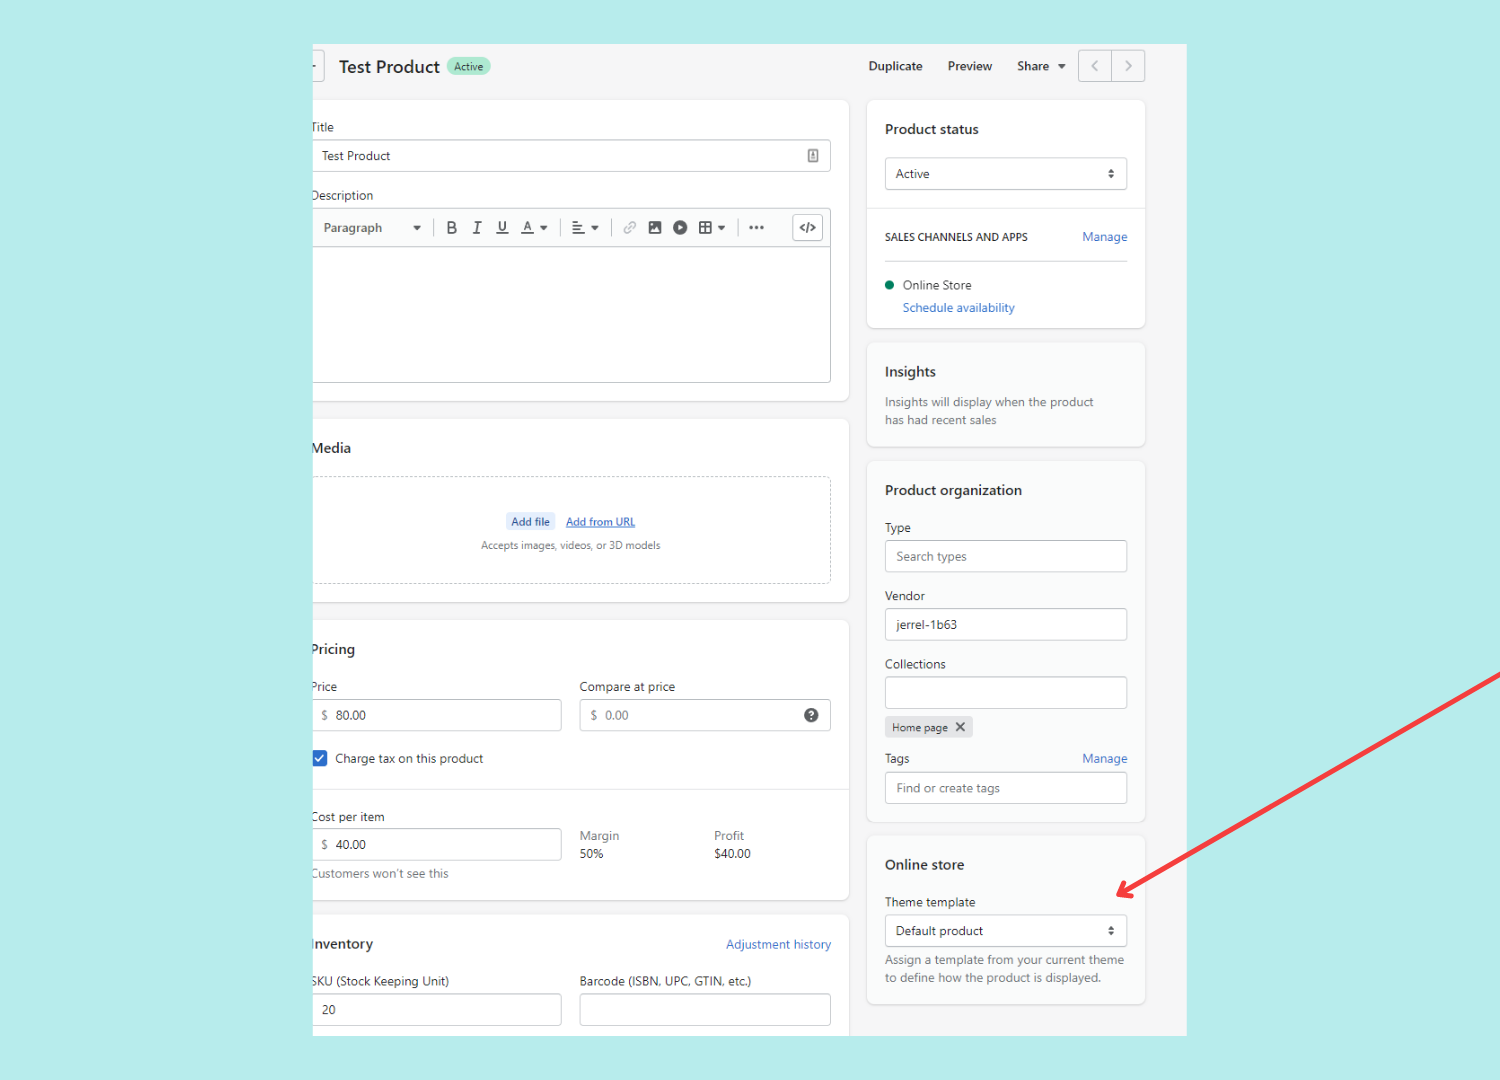
Here are 2 quick customizations you can make to your store to help it convert more as early as today.
The Shopify Checkout Page is one of the most crucial pieces of your store. It's where every customer makes the purchase, so you need to ensure that it's top-notch.
Luckily, creating a great checkout page isn't hard if you know what you're doing. Here's how to instantly boost conversions:
To learn more about these customization tactics checkout (excuse the pun) our full guide on how to create the perfect Shopify checkout page.
With a customized checkout page, you'll be getting more conversions. But the fun doesn't stop there. A customized thank you page can squeeze the most out of every sale & take your profits to the next level
There's a couple of simple customizations you can do to turn your 0% conversion rate thank you page into a money pumping machine: Here's how:
To learn more about how to implement these specific tactics check out our guide on thank you page optimization here.
Let's close off with 5 principles to live by when customizing your Shopify store.
As a business owner, customizing your own online store can seem like a daunting task.
From learning your way around the theme editor, to picking the perfect design and colors for your store, it's a whole lot to digest at once.
And developing your own theme? That's a whole different beast.
Hopefully, this Shopify customization guide helps you get a foothold and create a store that converts customers like crazy.
If you did find it helpful, make sure to check out the ReConvert blog for more guides like it!
Before we close off, let's cover the most common questions on Shopify stores.
Every Shopify store can be customized to some extent, but certain themes allow for more flexible customization than others.
Using the Shopify theme editor, you can edit the layout of most site pages for your store. You can use the template section to create multiple layouts to choose from for each page.
If you're opting to edit Shopify code directly, you can copy the code to a local file and edit it in your own staging environment. Once the code is ready, you can port it back to the Shopify platform.
Shopify is highly-customizable for an eCommerce platform.
When you factor in all of the add-ons, apps, and different themes you can use to customize your store, there's practically an option for every merchant out there.
Shopify gives merchants the ability to modify the code of their stores directly, but we don't recommend doing so.
At least, not if you don't have extensive coding knowledge on Shopify development. Otherwise, you run the risk of breaking your store.
You can use a platform like Upwork to find a Shopify theme developer, but it's not the only option.
There's also Fiverr, LinkedIn, and People Per Hour to try out.
Our recommendation is to stick with Upwork and LinkedIn, as they tend to have higher quality developers than the other platforms.
ProductReConvert has officially become Upsell.com. Here’s what’s changed, what stays the same, and what this means for your Shopify store.
 Marketing
eCommerce marketing automation allows you to free up time, provide a better experience, and ultimately, make more sales. Discover 10 simple, but proven eCommerce marketing automation examples you can implement to take your store to the next level.
 Marketing
You don’t need a huge budget to get your business or brand noticed. Our online marketing ideas for small businesses are designed to maximize ROI.
Get eCommerce insights that convert
One email a month, practical strategies on conversion, AOV, retention, and customer experience.