 Marketing
eCommerce Personalization: 6 Simple Strategies to Skyrocket Conversions
Personalizing your buyers journey is a fantastic way to boost conversions. Discover 6 simple ecommerce personalization tactics to try today.
1 min read
Facebook Ads is one of the best ways to market your goods.
But many eCommerce stores aren’t making as much money as they could be. Why? Because they’re not using the Facebook pixel properly.
The Facebook pixel tracks visitor behavior and interactions on your Shopify store. It provides data on engagement that you can use to optimize your ads.
So, if you’re ready to learn how to add the Facebook Pixel to Shopify, keep reading. We’ll show you how to set up your pixel, and optimize it for best results.
Sounds good? Let’s go!
Firstly, what exactly does Facebook Pixel on Shopify do?
The Facebook Pixel is a tiny piece of code that monitors website or “pixel” events on your store.
A website event is a specific action that users perform on your website.
For example, an event is an action like clicking on a product for more information, visiting a page, or making a purchase.
The Facebook Pixel monitors each of these events to give you data on the number of times they happen and with which type of customers.
With this information, Facebook can give you better results from your advertising.
For example, suppose Facebook shows your ads to 10,000 people and 200 people click on them. With the pixel, Facebook can learn more about those who are interested in your products by getting data from their visit to your store.
Subsequently, Facebook can show your ads to more people that are similar to those browsed your store.
Adding the Facebook Pixel to your eCom store is one of the best ways to boost your sales on Shopify. But how do you start? Let’s keep going to learn more.
The first step is to check that you have a Facebook ad account. If you haven’t, you need to set one up. If you don’t have an ad account set-up, follow these steps as outlined by Facebook.
Once you’ve configured your ad account, you can set up a pixel as follows:
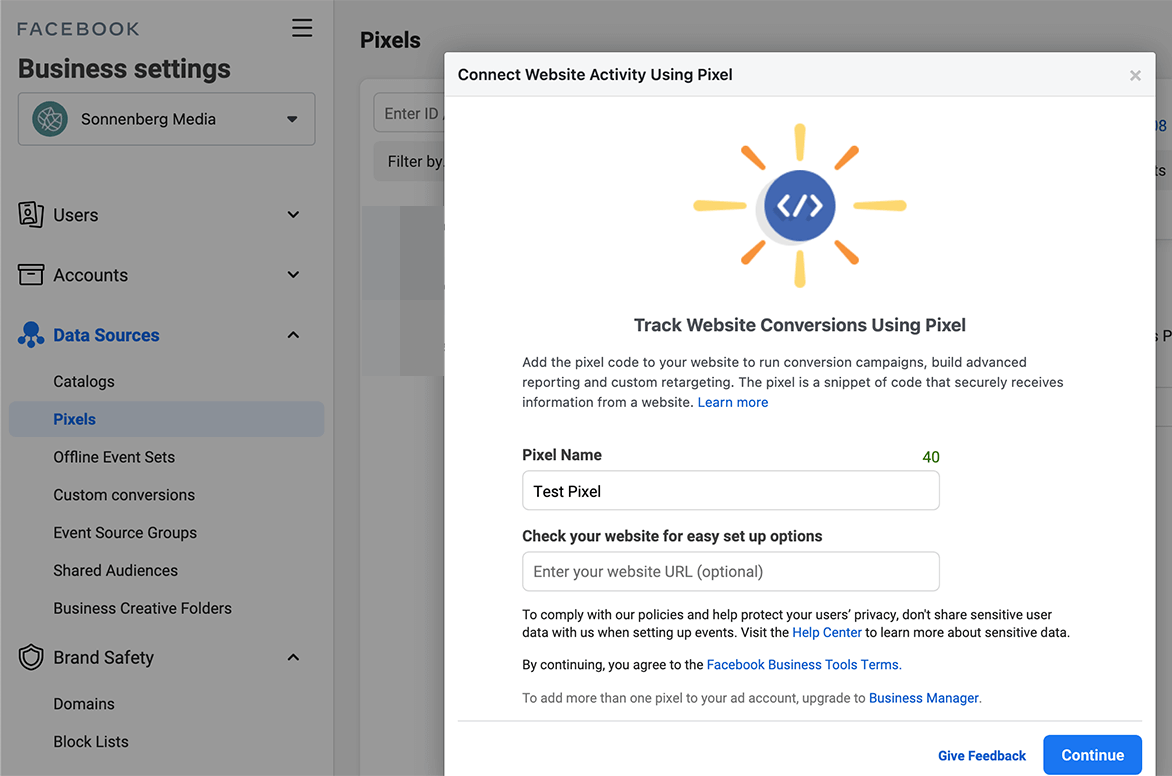
With your pixel created, you need to add the pixel to your website. Navigate to the Facebook ‘Check for Partner’ section.


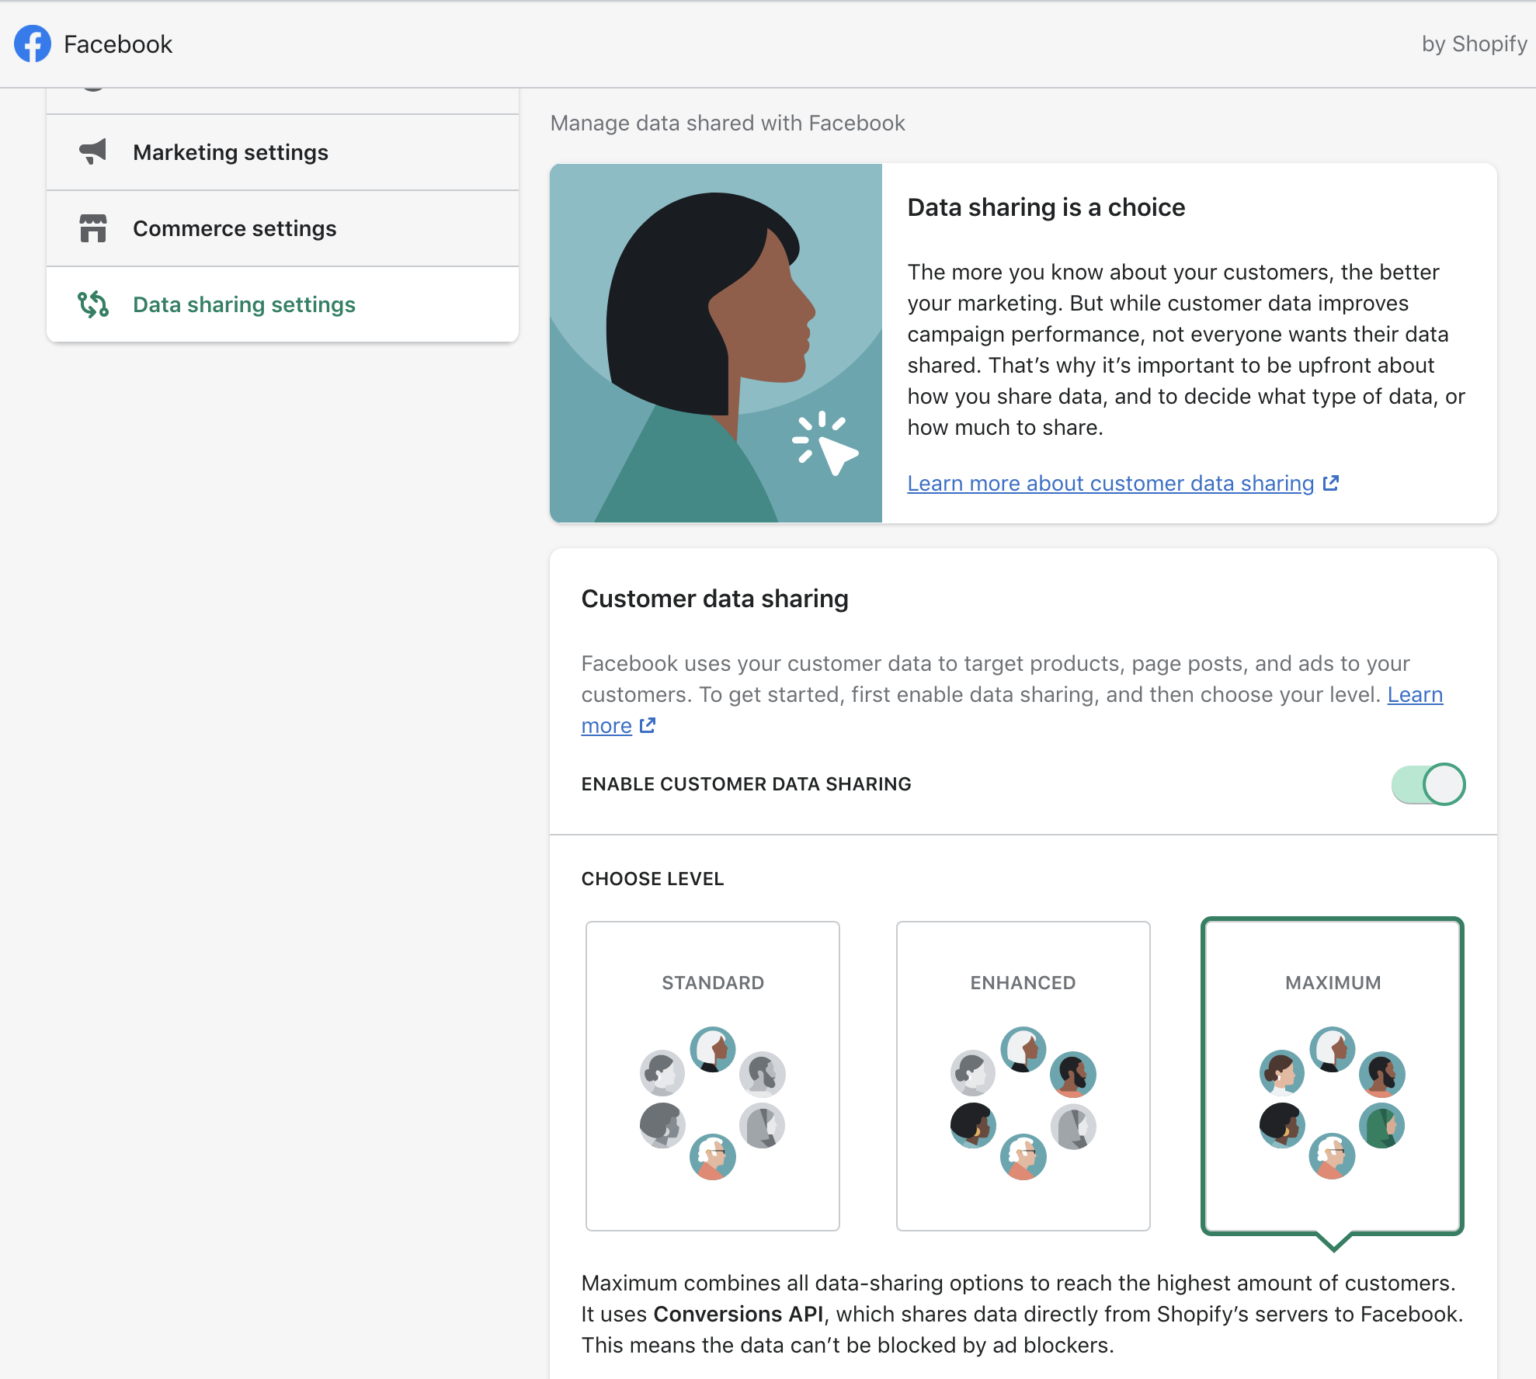
You can modify your data sharing level with three settings available: Standard, Enhanced, or Maximum. Once done, you’re good to go. Just click Confirm, and you’re all set.
If you want to go down the manual route of getting Facebook Pixel on Shopify, this is what you do.
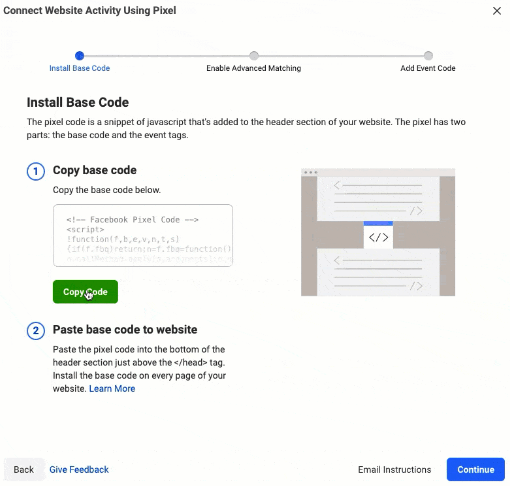
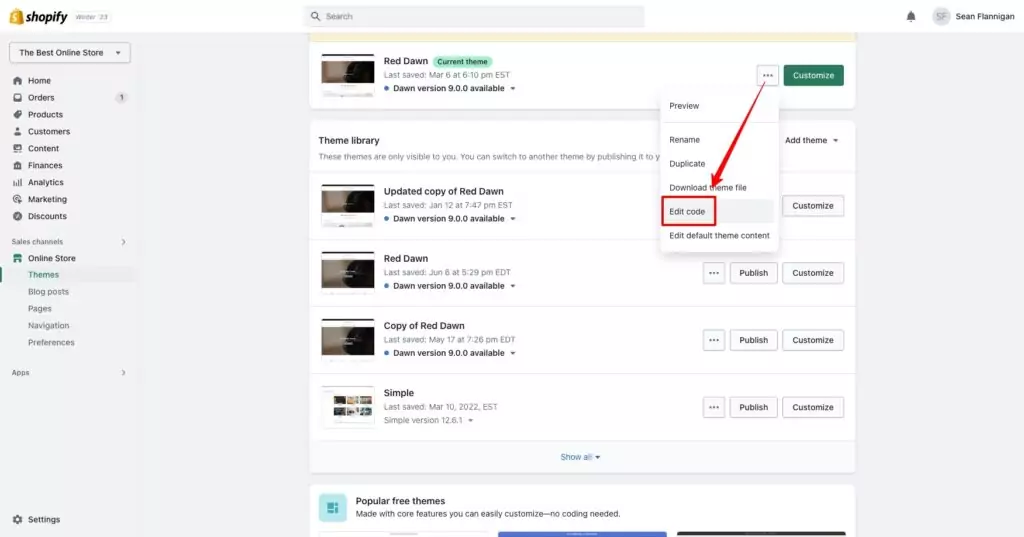
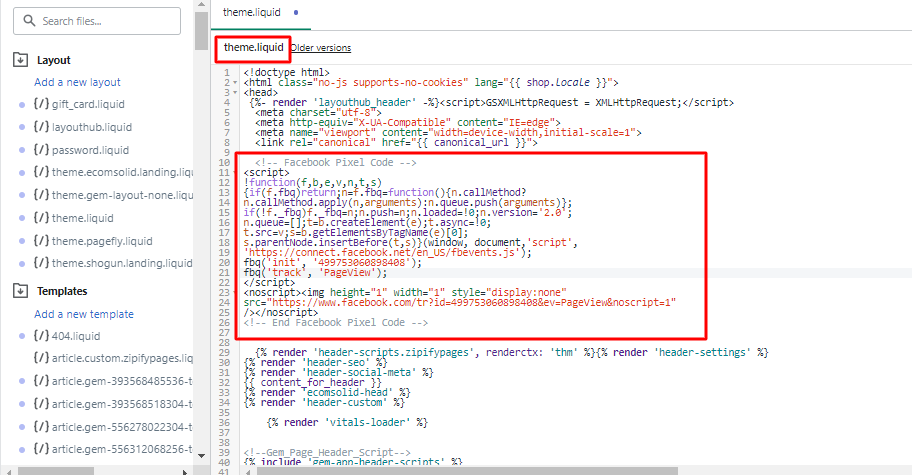
You can also use an alternative method:
That’s it. It’s somewhat more straightforward to do it manually. But it relies on you being a little more comfortable using codes than the more automated route.
All methods of adding the Facebook Pixel to Shopify work equally well, so choose whichever method seems most intuitive.
Now that you've added your Facebook Pixel to Shopify, it's time to learn how you can use it for better advertising.
There are five basic events that Facebook Pixel monitors. These are PageView, ViewContent, AddToCart, InitiateCheckout, and Purchase. Facebook Pixel delivers data on all these so that you can build up a picture of how people are moving around your site.
You can then combine this data with your order management software to help you track your customers' activity and purchases alongside your stock levels. This can help you spot any increase in orders or activity so that you can place extra orders if needed.
If somebody visits your site as a result of clicking on a Facebook ad, they may buy something from you, or they may not. Either way, they’ve shown they’re generally interested in your area of industry.
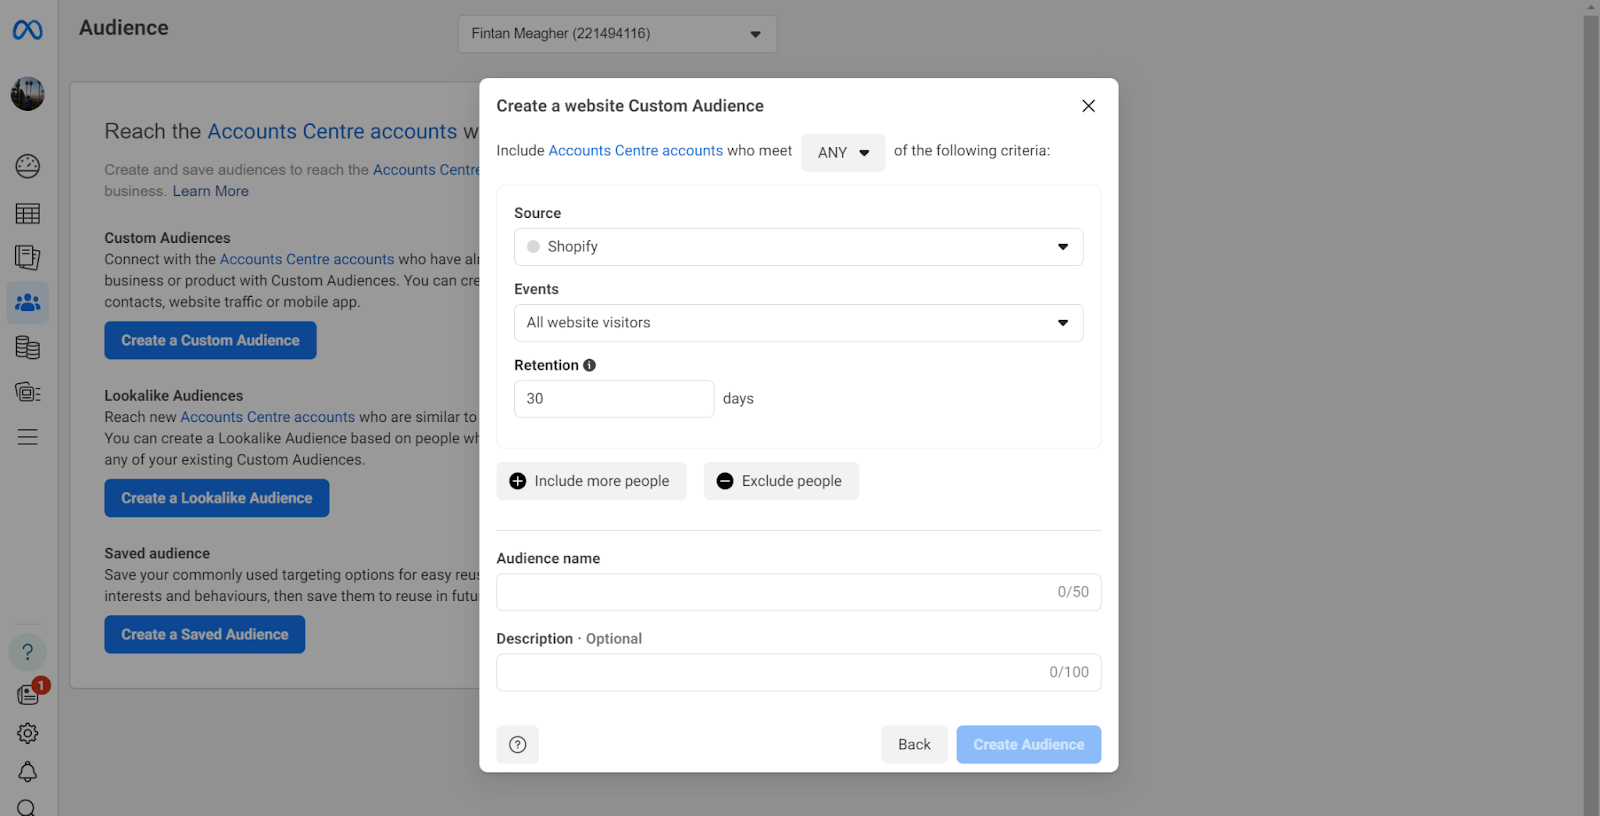
You can promote your Shopify site by creating a precise marketing field. Do this by building what’s known as a custom audience from people coming to your site or who trigger a specific event while there. Here’s how you do it.
Upsell.com helps you increase AOV with targeted offers across the full shopping journey, from product and cart to checkout, post purchase, and beyond.
By clicking Add a Parameter, you can fine-tune your custom audience to include those who trigger specific events.
You now have a custom audience that you can send marketing to with better results than you’d get with a random set of customers.
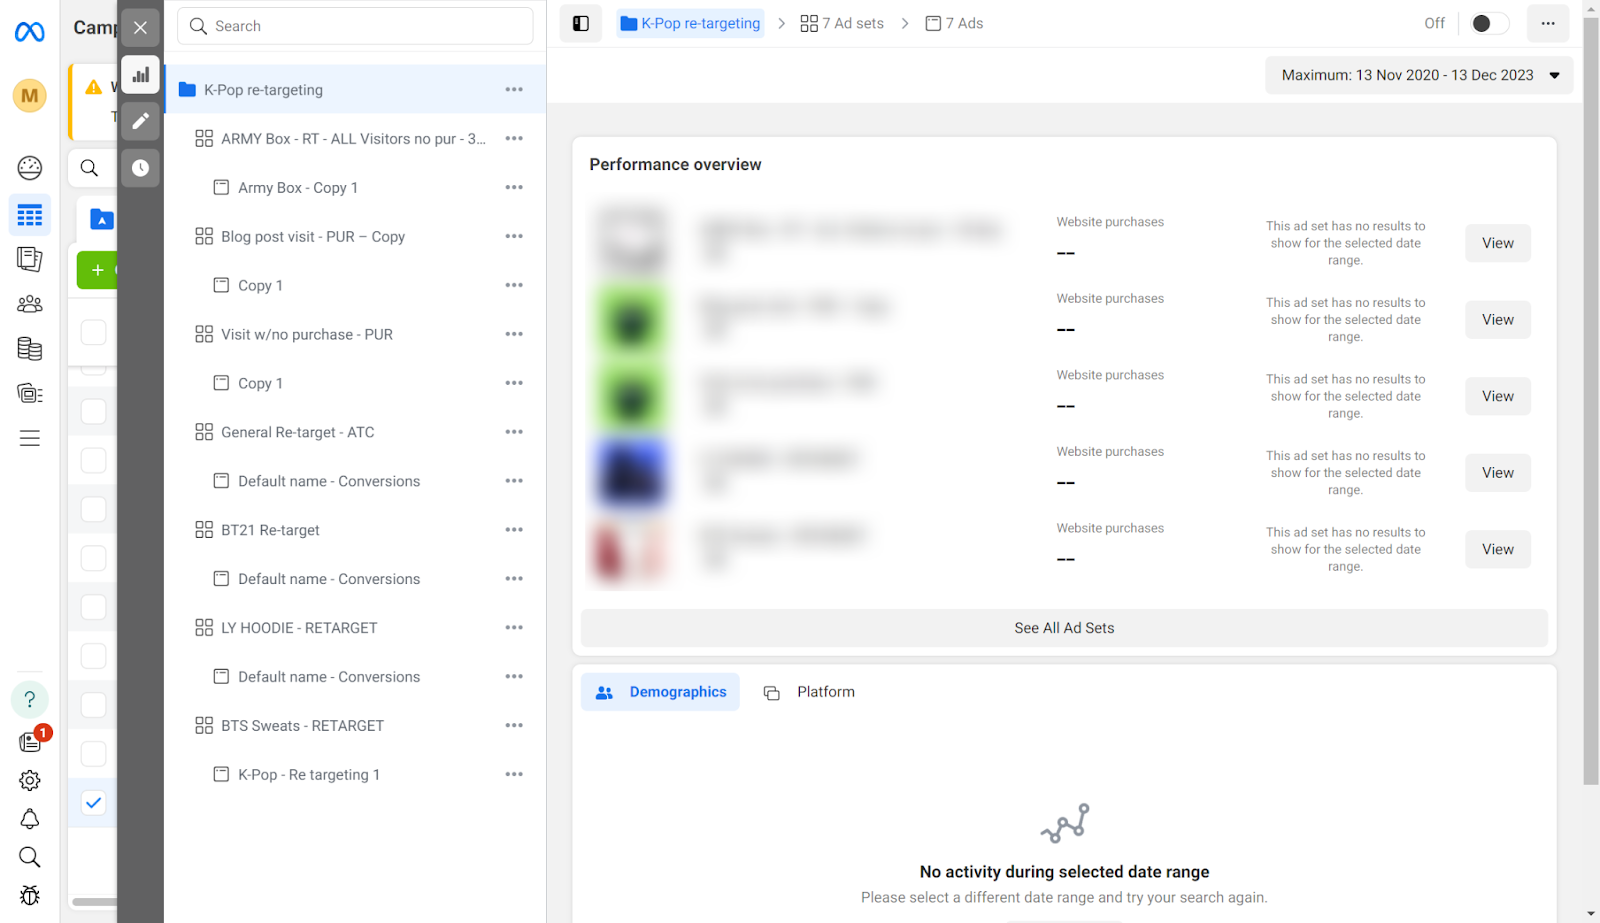
Retargeting ads are typically one of the highest ROI ad campaigns you can run.
You can implement various retargeting techniques through Facebook Pixel on Shopify to propel people down the conversion funnel. We’ll look at two of them.
Sometimes, a customer will visit a site and fully intend to purchase a product or products. They may click on the More Information button, they may put them in their shopping cart, and they may have started the checkout process. But for whatever reason, they may not see the purchase through to completion.
It could be that they got distracted. Or it could be that their manager walked into the office. In any case, it can be helpful to the customer to get a reminder that they have these items still sitting in their cart. Would they like to go through with the purchase now that they have a minute?
That this is beneficial to the business goes without saying. But we shouldn't overlook its assistive value to a busy consumer trying to cope with various pressures.
To create this kind of ad, create a custom audience of website visitors for the last 14 days. Then run an ad with a promotion to them offering a discount if they return and complete their purchase today.
Another retargeting technique is to set your Facebook Pixel to fire when an event takes place. This could be when a site visitor adds your item to their wishlist or views a video about your product, for example. You can use that data to retarget that customer with special offers or information relevant to that product.
Even better than this, you can track a customer’s engagement with a topic or product across their different devices. This way, your picture of what they’re interested in throughout the day becomes richer and more detailed.

Once you have a custom audience for your marketing campaigns, you don’t need to stop there. You can increase your potential market by constructing lookalike audiences. These are groups of customers who mirror your custom audience. They will share certain pertinent characteristics and user behaviors.
In this way, you can boost your marketing reach, but not just by flinging out more and more ads in the hope they’ll get noticed. Constructing a fertile audience and then asking Facebook to come up with much more of the same will give you a great marketing operation. It will broaden your scope while targeting those most likely to respond.
You can also create custom audiences directly from website events. So, let’s suppose you have 2,000 customers tracked on your Facebook Pixel. You can use these purchase events to create a massive audience of other potential customers who are very similar to your customers.
We recommend creating 1%, 5% and 10% lookalike audiences and running ads to them to see which performs best. Remember, with Facebook ads, testing is always critical for best results.
By getting a clear picture of the conversions that a particular ad secures, you’ll be in a great place. You'll be able to establish some firm ROI figures for your marketing. You can go general or more detailed, such as setting your parameters to get insights into spend per click for a given ad.
You can then use this marketing ROI data in your subsequent advertising campaigns. If you’re trying to decide if a marketing campaign justifies the amount they’re likely to cost you, you can get a steer from past performances.
You can also combine this data with data from other sources such as your accounts payable software or your CRM software to give you a more holistic view of your spending and marketing efforts. This can help give you a more accurate picture of your marketing campaign and help you better plan your marketing budgets in the future.
You can also use these kinds of deeper insights to persuade other parties. The combined data can be used to create a detailed report that you can present to a boss, a client, or whoever it is you need to sway to get the marketing budget signed off.
There are plenty of problems that tend to crop up, but the good news is that they’re usually solvable.
One of the biggest helps is to download the Facebook Pixel Helper (the Chrome version is here).
Keep going until you have the five basic events we mentioned above covered. You should see all of the steps appearing as above when you go through them. This will show you that Facebook Pixel on Shopify is monitoring events correctly.
When you set up your pixel in the first place, double-check that you’ve used the correct pixel base code.
Don’t forget that the event code needs to include an event name. Otherwise, you’ll get a Missing Event Name error message.
You need to make sure that you spell standard events right. They’re case-sensitive, so don't write ViewContent as viewcontent, or it’ll be treated as a custom event without definition. If an event is similar but not identical to a standard event, you’ll get an Event Name Mismatch error message.
Sometimes, a pixel will misreport the number of events. This may be because more than one action ties to, for instance, the Purchase event. It’s obviously important for data accuracy that an event is only recorded when one particular action takes place. Otherwise, you may have an over-reporting of events.
Sometimes, this kind of over-reporting can take place as a result of a mix of automation and website source code, producing event duplication. You can turn off any automatic events that are being triggered and skewing the data.
You may get error messages telling you that certain kinds of data collection violate Meta’s terms and policies. The process then halts. This data can include health, financial, and other personal information that Meta forbids you to process. To solve this problem, you need to review exactly what data you collect. Then, remove any problematic instances.
You may have the best Shopify site in the business. But it won’t succeed unless people know about it and are persuaded to visit it. This is where Facebook Pixel on Shopify can be a game changer. Using the above simple steps, you can keep an accurate eye on what aspects of your marketing deliver the best results. This will then inform your future campaigns.
The end result will be an expanded customer base, which is a gigantic result from a little pixel.
Let's quickly cover some of the most commonly asked questions around installing the Facebook Pixel on Shopify.
Yes, you can easily add the Facebook pixel to Shopify by navigating to your Shopify admin, selecting "Online Store," and then adding the pixel code to the "Facebook Pixel" section.
The Facebook pixel on Shopify helps track and measure the effectiveness of your Facebook ads. It provides valuable insights into user behavior, allowing you to optimize your advertising strategy and retarget visitors for better conversion rates.
Locate your Facebook pixel on Shopify by accessing your Shopify admin, navigating to "Online Store," selecting "Preferences," and then finding the "Facebook Pixel" section. Copy and paste your Facebook pixel ID or integrate it directly with your Facebook Business Manager for seamless tracking of user interactions on your Shopify store.
There could be various reasons why your Facebook pixel is not connecting to Shopify. Common issues include incorrect installation of the pixel code, discrepancies in the account settings, or issues with your browser. Double-check the pixel installation, ensure the account permissions are correct, and try using a different browser if you encounter difficulties.
MarketingPersonalizing your buyers journey is a fantastic way to boost conversions. Discover 6 simple ecommerce personalization tactics to try today.
 Marketing
You don’t need a huge budget to get your business or brand noticed. Our online marketing ideas for small businesses are designed to maximize ROI.
 Marketing
eCommerce marketing automation allows you to free up time, provide a better experience, and ultimately, make more sales. Discover 10 simple, but proven eCommerce marketing automation examples you can implement to take your store to the next level.
Get eCommerce insights that convert
One email a month, practical strategies on conversion, AOV, retention, and customer experience.